


Raise your hand if you’ve ever dashed to the bathroom mirror, excited after watching a contour tutorial, only to end up with a contour disaster? Whether you’re a makeup novice or a seasoned contour enthusiast, it’s common to experience a few contouring blunders along the way.
While the art of contouring may seem daunting and time-consuming, it doesn’t have to be if you have the right guidance. In this guide, we will illuminate the process of contouring your face in five straightforward steps, including tips on how to highlight effectively, as well as recommend the best contour products to achieve a beautifully sculpted complexion.
Understanding the Art of Contouring
Have you noticed that beautifully sculpted or ‘snatched’ appearance frequently showcased by beauty influencers or celebrities? That’s the magic of contouring. Essentially, contouring is a technique designed to slim your face and enhance your cheekbones or other prominent features. But what exactly is the science behind this transformative process?
Contouring involves the strategic use of shading to create an illusion of depth and recession in certain areas of your face. By applying darker shades to specific regions, you can redefine or reshape your features, making the areas that remain untouched by shadow stand out more. This technique can make your cheekbones appear more pronounced or even give the illusion of a narrower nose—the possibilities are truly limitless!
Choosing the Right Contour Products for Flawless Application
Although we may not be at the pinnacle of the contouring trend as we once were, the quest for a sculpted look is still very much alive and vibrant. Regardless of whether you’re an absolute beginner or a contouring pro, we’re here to guide you toward achieving a more sculpted and defined appearance—one that leans towards a natural finish rather than the heavy looks of the past.
Your journey into the world of contouring begins with selecting the right products. This means moving away from heavy foundations and concealers in favor of natural, lightweight contour makeup that enhances rather than overwhelms. However, that doesn’t mean you can’t inject a bit of definition and flair into your look with a few simple strokes and carefully chosen products!
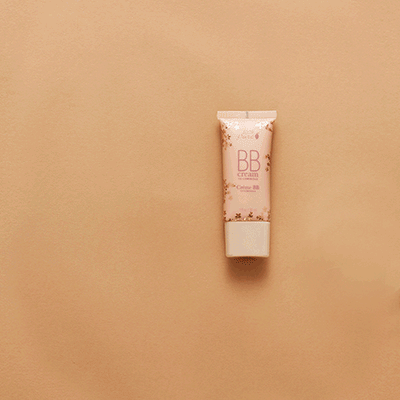
#1. Cream Contour
Now for the exciting part—you don’t need an elaborate contour wand to achieve a beautifully chiseled complexion. A cream contour can effectively create shadows or enhance your facial features. Opting for cooler tones from our Fruit Pigmented® Cream Foundation collection can help to create contrast, sharpen angles, and slenderize your face. Plus, these products are derived from fruit, vegetable, and seed pigments, offering both a feel-good experience for your skin and antioxidant benefits!
The primary goal of contouring is to provide realistic depth and dimension to your face. If you’re using products that are difficult to blend, especially as a beginner, creating smooth contours may become a challenge. Therefore, using a powder contour can facilitate quicker blending, allowing you to enhance your facial angles effortlessly.
A perfect matte base for your contouring efforts is our Cocoa Pigmented Bronzer, enriched with vitamin-rich fruits and natural cocoa pigment. You can achieve a beautifully natural chiseled look in just a minute of application. Plus, this bronzer is easily removable, making it perfect for those still honing their contouring skills.
#3. Liquid Contour
The last thing you want is to end up with cakey makeup or an overly defined contoured appearance. For a natural contour that feels like a ‘second skin,’ consider using a natural concealer as your contour product. This option provides effortlessly blendable and buildable coverage for a soft, natural finish.
Our 2nd Skin Concealer is a must-have in any natural contour makeup routine, as it utilizes healthy fruits and vegetables to provide color, along with skin-softening olive squalene for a lightweight, satin finish that doesn’t feel heavy.
Choosing the Ideal Contour Technique for Your Unique Face Shape
You’ve gathered your tools and selected your products—but if your contouring doesn’t enhance your features, something is missing. That missing element is a clear understanding of your face shape. When you contour based on your natural bone structure, you stop fighting against your features and start enhancing their inherent beauty. This comprehensive guide will enable you to apply contouring makeup in a manner that complements your unique structure, ensuring your look feels tailored and effortlessly chic.
Pro Tip: Recognizing your face shape is essential for achieving the most flattering contour makeup look—remember, contouring is not a one-size-fits-all approach!
Round Face – Adding Structure & Elongation
Your goal: Introduce structure and elongate your face.
Where to contour: Apply contour makeup along the sides of your forehead, beneath your cheekbones, and just under your jawline. Concentrate your highlighter on the center of your forehead, nose, and chin to draw the eye vertically, creating the illusion of length.
Bonus: Avoid blending in circular motions—instead, use more angular, upward strokes to subtly sharpen the appearance of your face.
Oval Face – Enhancing Natural Symmetry
Your goal: Maintain balance while adding gentle definition.
Where to contour: Lightly contour beneath the cheekbones and along the temples. Since oval faces are naturally balanced, your contour should serve to softly define rather than reshape.
Bonus: Use a light hand when applying product. In this case, less truly is more.
Square Face – Softening the Angular Features
Your goal: Soften defined jawlines and forehead edges while maintaining that stunning definition.
Where to contour: Focus on the sides of the forehead and along the jawline to round out sharp edges. Blend beneath the cheekbones, angling slightly downward rather than straight across, to add depth without creating harsh lines.
Bonus: A warm-toned contour can introduce a touch of softness if your features appear overly angular with cooler tones.
Heart-Shaped Face – Balancing the Features
Your goal: Emphasize cheekbones while minimizing a wider forehead or pointed chin.
Where to contour: Shade the sides of the forehead and temples to bring them in, and apply contour just under the cheekbones, blending it upward. Keep the product minimal on the jawline, but if needed, apply a small amount beneath the chin to create balance.
Bonus: Don’t forget to apply highlighter—it draws attention to your best feature: those stunning cheekbones.
Diamond Face – Precision Highlighting for Symmetry
Your goal: Soften wide cheekbones while drawing focus to the eyes and jawline.
Where to contour: Lightly contour the widest points of your cheeks, and blend along the forehead and jawline for an even width. Use highlighter on the center of your forehead, chin, and under-eye area to create balance and a radiant glow.
Bonus: A subtle shimmer on the brow bone helps draw attention upward, enhancing overall symmetry.
Whether you are still mastering the art of contouring or looking to refine your technique, selecting the right contour method for your face shape can make a significant difference. With a bit of strategic shading and a firm understanding of your facial structure, your contouring makeup routine can transform from average to effortlessly chic in mere minutes.
Mastering the Contouring Process: 5 Simple Steps
Now that we’ve got the right contour products in our beauty toolkit, it’s time to move on to the next crucial aspect of contouring 101: effectively contouring your face. The process becomes far more approachable and efficient when you can cut application time in half.
That’s why we’re providing a clear path to contour your face with a few straightforward steps that anyone—yes, even beginners—can follow with just a few makeup tools or products!
STEP 1: Choose Your Primer and Foundation
Select your preferred foundation shade and apply it in your usual manner. Set yourself up for contouring success by starting with either a Mattifying Primer or a Luminous Primer to create a smooth base.
PRO TIP: Utilize a kabuki brush or makeup blender to buff and blend this lightweight foundation into your skin, beginning at the center of your face and working outward for an even finish.
STEP 2: Shade the Key Areas
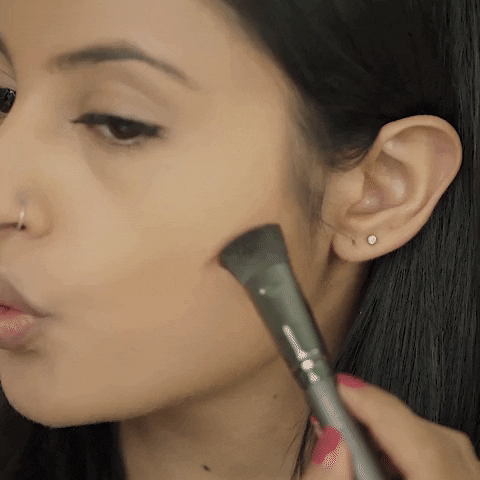
As mentioned earlier, choose a cream, powder, or liquid contour that is 1-2 shades DARKER than your normal foundation shade or a few shades deeper than your skin tone. Use a larger brush to apply contour to your cheekbones and jawline, rather than a smaller brush tip. A larger shape fits seamlessly into the angles and hollows of your cheeks and lower jaw, while being soft enough to blend out for a natural appearance.
PRO TIP: An angled contour brush can help you apply the contour or bronzer in a more controlled manner in smaller areas, such as the sides of your nose or hairline.
STEP 3: Blend It Out
Begin with a lighter application. You can always build up intensity later. Remember, it’s much easier to add than to take away! Be sure to blend extensively, ensuring there are no harsh, visible lines.
STEP 4: Highlight for Dimension
While contouring is fantastic for sculpting and enhancing your face’s structure, highlighting is another powerful tool in your makeup arsenal. For quick definition, highlighting can work wonders.
Identify the key areas on your face that you wish to accentuate—the tops of your cheekbones, brow bones, cupid’s bow, bridge of your nose, and chin. This creates an illusion of dimension and definition. Our Gemmed Luminizers deliver stunning shimmer and sparkle from real gemstones while being nourishing for your skin.
PRO TIP: Use a small brush and a highlighter if you want to contour your nose for a slimmer appearance or to add a pop of shimmer to your eyelids or inner eye corners.
Avoiding Common Contouring Mistakes for a Flawless Look
Even the best contouring techniques can go awry due to a few simple missteps. If you’ve ever gazed into the mirror and wondered why your sculpted cheekbones aren’t delivering the desired effect, you’re not alone. Mastering the art of contouring takes more than just knowing where to apply product. Let’s tackle the most common contouring mistakes so you can step out looking lifted, defined, and effortlessly chic.
1. Choosing the Wrong Shade
The Problem: If your contour shade is too warm, too dark, or too light, it can end up looking muddy—or worse, orange. Many people confuse bronzer with contour, but they serve different purposes. Bronzer adds warmth, while contour creates shadows.
The Fix:
Opt for a contour shade that is one to two shades deeper than your natural skin tone with a cool or neutral undertone. This mimics the appearance of natural shadows, which is the essence of contouring. If you’re uncertain, test shades along your jawline in natural light. The ideal contour should recede, not stand out.
2. Harsh, Unblended Lines
The Problem: Harsh lines can make even the most premium contouring makeup look obvious or theatrical (unless that’s the aesthetic you’re aiming for—we see you, drag queens and stage performers).
The Fix:
Blend as if your paycheck depends on it. Use a damp beauty sponge or a soft, angled brush to diffuse the edges. Make small, circular motions instead of back-and-forth swipes. The goal? Subtle shadows that whisper rather than shout.
3. Overapplying Product
The Problem: More product doesn’t equal more definition—it often results in more blending. Over-contouring can age your appearance or create an unrealistic look.
The Fix:
Begin with a light hand and build product only where necessary. A small amount goes a long way, particularly with cream formulas. Remember: you can always add more, but you can’t take away once it’s applied!
4. Neglecting Highlighter
The Problem: Skipping highlighter after contouring is like telling a story without a climax—flat and incomplete. Highlighter complements contour by illuminating the high points of your face, balancing out the shadows.
The Fix:
After you contour, apply a subtle highlighter to the tops of your cheekbones, the bridge of your nose, and your cupid’s bow. This adds a lifted, lit-from-within glow that makes your contour pop without appearing heavy.
5. Using Incorrect Application Tools
The Problem: The tools you use can greatly influence your look. Employing a dense foundation brush for powder contour or a fluffy brush for creams can result in streaks or complicate blending.
The Fix:
Use an angled brush for powder contours and a dense stippling brush or damp sponge for cream products. These tools are designed to help you apply and blend product precisely where you need it—making your makeup routine easier and your cheekbones more defined.
You don’t need to be a professional makeup artist to contour like a pro. By avoiding these common pitfalls, you can establish a contouring routine that is quick, flattering, and entirely foolproof. Whether you’re still in the learning phase or perfecting your technique, keep this in mind: the best contour enhances your natural beauty—you.
Your Guide to Contouring Success
Contouring may be trending in beauty circles, but it’s here to stay—transforming faces and boosting confidence. By following these foolproof steps on how to contour and selecting the right products to highlight your best features, you can feel less intimidated by the art of contouring and more eager to try the coveted chiseled look for yourself.
Frequently Asked Questions About Contouring
How do I contour my face step by step?
Effective contouring begins with excellent preparation. Here’s a straightforward step-by-step guide to get you started:
- Prep your skin: Cleanse, moisturize, and apply a primer for a smooth application.
- Apply foundation: Even out your complexion with a foundation that matches your skin tone.
- Map your face: Use a contour product (cream or powder) one to two shades darker than your skin tone. Apply it to the hollows of your cheeks, sides of the forehead, jawline, and sides of the nose.
- Blend, blend, blend: Use a damp sponge or a contour brush to seamlessly blend the product into your skin until it resembles a natural shadow.
- Highlight: Apply a lighter shade or highlighter to the tops of your cheekbones, center of the forehead, bridge of your nose, and chin.
- Set your makeup: Use a translucent or pressed powder to lock everything in place.
Mastering how to contour your face requires practice, so don’t hesitate to experiment!
What is the difference between bronzer and contour?
The distinction between bronzer and contour lies in their function and finish.
- Bronzer is used to add warmth and mimic a sun-kissed glow. It typically contains some shimmer and is applied to the high points of the face where sunlight naturally hits—such as the cheeks, nose, and forehead.
- Contour is used to create shadows and define features. It is usually matte and cooler in tone, applied under cheekbones, along the jawline, and on the sides of the nose to sculpt the face.
While they serve different purposes, bronzer and contour work beautifully together when applied strategically!
How do I contour my nose to make it appear slimmer?
Contouring your nose involves subtle shading and clean lines:
- Use a small, angled brush to apply a contour shade along the sides of the bridge of your nose.
- Connect the lines at the tip to shorten and lift the nose if desired.
- Carefully blend with a fluffy eyeshadow brush or a damp sponge.
- Highlight the bridge of your nose (keeping the line thin and centered) to draw the eye inward.
Use a light hand with the product—nose contouring can be easy to overdo. A small amount can create a significant impact!
What’s the best contour makeup for beginners?
For those just starting with contouring makeup, look for products that are:
- Cream-based or stick formulas (which are easier to blend and correct)
- Buildable rather than excessively pigmented
- Cool-toned or neutral shades that mimic natural shadows
Some beginner-friendly contour products include:
- Cream contour sticks (like Fenty Beauty or NYX Wonder Stick)
- Drugstore powder contour palettes with multiple shades to experiment with
- Dual-ended contour/highlight tools for added convenience
The ideal contour is one that complements your skin tone, blends easily, and boosts your confidence.
How do I ensure my contour lasts all day?
To lock in your contour look, adhere to these tips:
- Begin with a primer to secure the product.
- Layer cream and powder products for extended longevity—apply cream contour first, then set it with powder contour.
- Utilize setting powder across your entire face to minimize oil and shine.
- Finish with setting spray to keep everything intact through heat, sweat, and long days.
These steps will help maintain the freshness of your contour makeup throughout the day—no touch-ups needed.